|
Core Assembly
Core assembly is fairly simple, but when you try to put it into words, you get a long page, like this one. Start with these two videos. That might be enough right there. But read all the explict instructions that follow anyway, just to be sure. The first video is a quick overview that shows the whole procedure. The second video explains the "key rib" concept that gets the assembly process started correctly, so that the rest is dead simple. and now, enchilada entire: STRINGERS
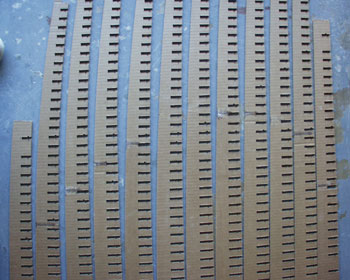
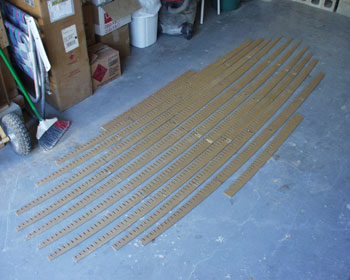
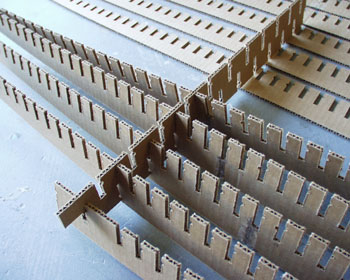
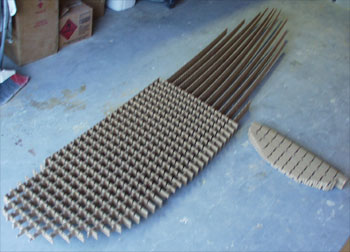
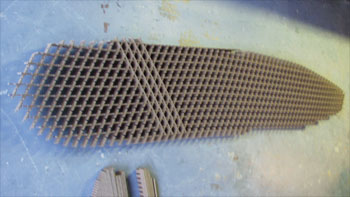
There is a set of lengthwise stringer pieces. They are numbered by their placement in the finished board, from left to right (looking down on the deck of the board, facing the front), beginning at number 1. When each stringer is glued together from smaller pieces, each piece of a stringer has the same number, and then a letter to indicate it's place in that stringer. The number and letter of each piece will always be at the front end of that piece. (Front with respect to the front end of the finished board.) RIBS - FIRST SET
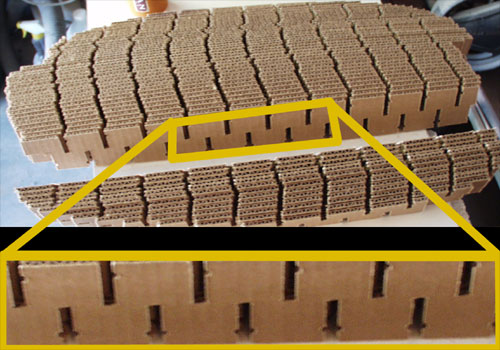
 There are two sets of diagonal ribs. The first set is the one whose pieces have notches facing both up and down. The ribs are numbered sequentiallyby where they fit in the board, from the front of the board to the back. The number sequence for the first set begins where the numbers for the stringers left off. The number of each rib usually appears closest to the front end of that rib - that is the end of the the rib that will be closest to the front of the completed board. (Occasionally a very short piece might have it's number closer to the rear because the auto-numbering system had a hard time fitting it in around notches. You should be able to tell by context though which end of those small pieces goes forward.) RIBS - SECOND SET
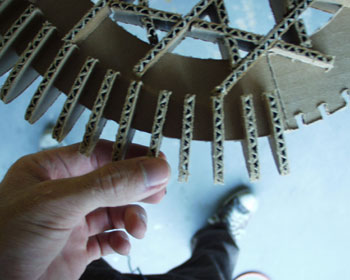
 In the second set of diagonal ribs, the notches of all the pieces face down. They are also numberd sequentially by where they fit in the board, from front to back. The number sequence for the second set begins where the sequence for the first set leaves off. Just as with the first set, a piece's number usually appears closest to the front end of each piece. Once you get the first diagonal rib properly placed into the notches of the stringer pieces, every other piece just goes in sequentially before and after that first piece. But how do you place and match up the notches between that first piece and all those notches on the stringers? We need a way to identify which diagonal piece should be placed first, and exactly which notches in the stringers it should fit into. This leads to the ideas of "key ribs" and "key notches". KEY RIBS
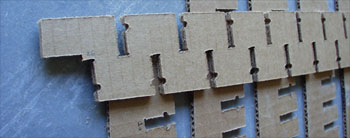
 In each set of diagonal ribs there is one piece that has downward facing "key notches". For each set, these key ribs will be the first ones placed into the core assembly. The remaining ribs will simply be placed sequentially before and after the key ribs. KEY NOTCHES
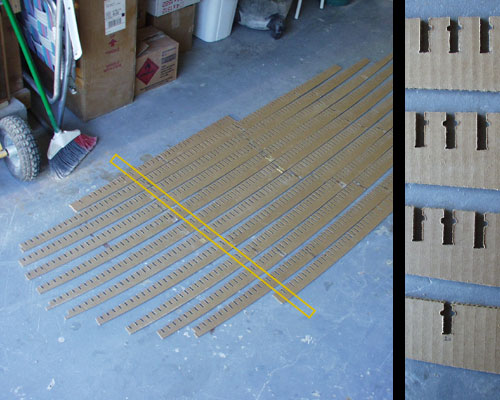
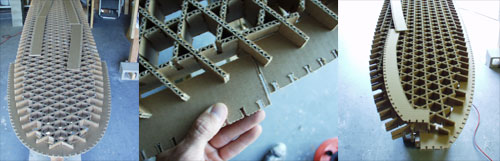
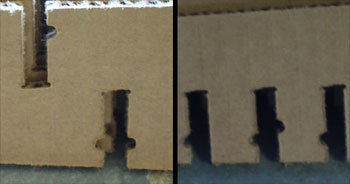 All notches have little half-circle ventilation holes cut in one side. Key notches have an extra ventilation hole cut in the opposite side of the notch. Key notches associated with the first set of diagonal ribs have the extra ventilation hole set directly across from the first. Key notches associated with the second set of diagonal ribs have the extra ventilation hole set diagonally across from the first, a bit deeper in the notch. Those are the concepts. Now here's the procedure. First, build up all the stringers from their parts. You can do this by simply taping the parts together with packing tape. The joints don't need to be especially strong. They just need to hold up to handling while doing the core assembly. The video shows taping together a stringer from four pieces. A straightedge helps get the bottom edge aligned. Do this on a wide smooth surface so you can easily slide the pieces around and have them align when you butt the butt joint edges together.
To start the core assembly, lay all the stringer pieces out, with number 1 closest to you, and the front ends of the stringers to your left.
Align all the key notches in the stringers that are associated with the first set of ribs. These are the notches that have an extra ventilation hole directly across from the first.
Find the key rib in the first set of diagonal ribs.
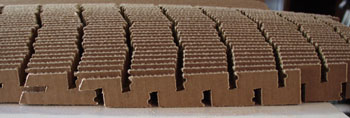
Carefully and gently stand each stringer piece on edge, fitting it's aligned key notches up into the downward facing key notches of the key rib. The number on the key rib should be on the end closest to you, since that will be the front end later, when you shift the rib into it's correct diagonal orientation.
Usually, with patience, you can get the first rib in place with just two hands. But bring in more hands or props if you need them. All along, move carefully, and avoid putting too much strain on the stringers' glue joints.
Once the first key rib is in, place the next several ribs in the sequence in every other row of notches. (The rows you're skipping match up with ribs from the second set.)
Consider whether you should add some support under either end of the board, to lessen the strain on the stringers as you press ribs into place. A rolled up towel is often enough. Sometimes you don't need anything.
Place several ribs working backward in the number sequence from the key rib, toward the front of the board.
Before you place all the ribs from the first set, it's good to get the key rib from the second set put in place. The ribs in the second set fit down into the notches of both the stringers and the first set of ribs. So before you place the key rib from the second set, make sure all the pieces from the first set that lie under it are in place. You'll be able to see where the second set's key rib goes by the matching key notches in the stringers.
As you place the second key rib, you must shift, or skew the structure into proper alignment. This can be difficult. Multiple sets of hands might be helpful, but it's possible to do it alone. Skew the structure into alignment, start working the key rib into proper line of notches, pushing it down a little at a time on each end and in the middle. Squeeze or relax the sections of diamonds formed by the stringers and first set of ribs until you've worked the key rib's downward facing notches into alignment with all the upward facing notches it needs to fit into. Make sure you're putting this second key rib in the correct orientation. Make sure it's number is closer to the front end of the board. Make sure this key rib's key notches are matching up with the same style of key notches in the stringer pieces. There should be no unfilled notches. Every downward facing notch should be fitting into an upward facing notch.
After getting that second key rib in place, put in a few more ribs after it. this time, each sequential rib should be fit into the the next available row of open notches.
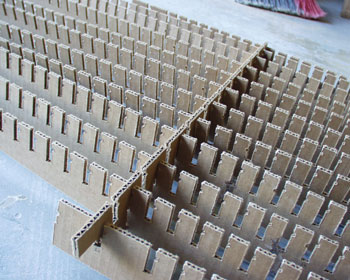
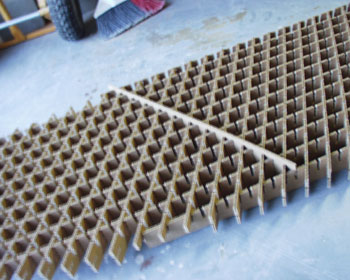
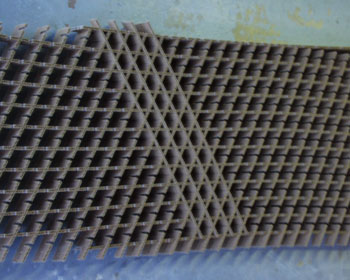
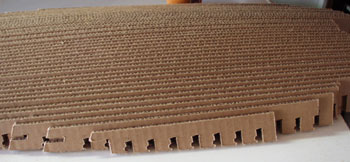
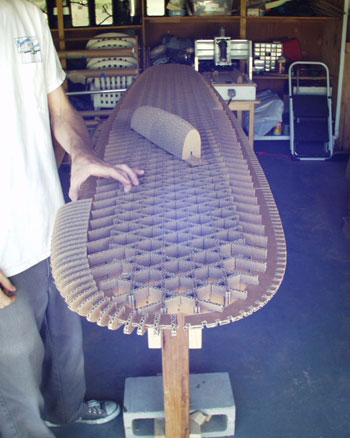
Finish putting all the remaining ribs from the first set into place. Then insert all the remaining pieces of the second set. Depending on how tight the notches are, and the shape of the board you're building, the ribs of the second set might be difficult to fit into place. Oh well. Just do your best not to bend or buckle the pieces as you work them into place. The structure may appear warped - the stringers bending to one side - until you get all the pieces of the second set in place.
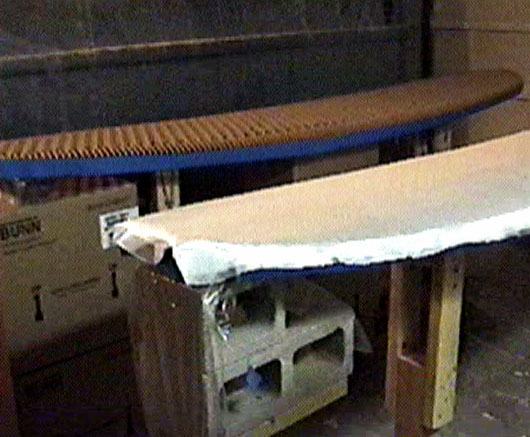
As you place each piece of the second set, make sure that it's fully seated, that the notches from left to right are all bottomed-out or fully mated. Just before glassing, when the core assembly is fully assembled and up on the glassing stand, you should check again that all the ribs are fully seated. This means manually visiting and pressing all the intersections together. Most should already be fully seated, but you might a few that need this final nudge. Typically short stringer pieces on the sides and an odd rib or two benefit from this final alignment check. It should take less than 10 minutes to do this. It's a small preparation detail that can make a big difference in how smooth your final glass job turns out. JOINERS
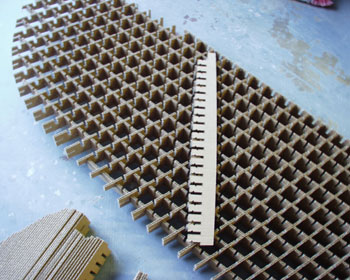
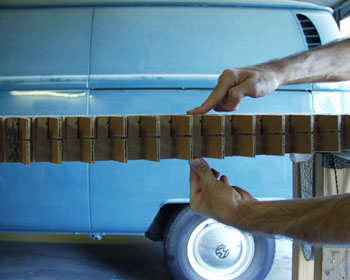
 Fit the rail joiner pieces into the horizontal slots in the ends of the ribs. Start with the front or back joiner pieces. Put the front or back pieces from both sides in place and make sure they're centered and symmetrical where they meet. Then work each subsequent piece into place on each side, so that it's end just touches the end of the previously placed piece. By the time you work your way to the other end of the board, the pieces on each side there should match up symmetrically at the center. But they probably won't. So make whatever fine adjustments are needed, possibly shifting other pieces along the length of the board, until the alignment is good. Once you get all the rail pieces in place on the joiners, you might find the alignment is a bit off where some of the joiner pieces meet. If a nudge doesn't fix this, there are simple things you can do with glue, and/or paper shims in notches to bring the joiner piece ends to the same level. Usually the alignment is good enough without any special treatment. RAILS
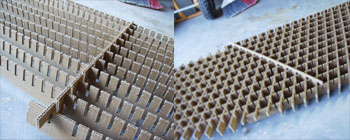
 Take a handful of rail pieces at a time and fit them into the notches in the joiner pieces, starting on either side, with piece number one fitting into the first joiner notch at the front of the board on that side. Make sure every piece slides all the way into the joiner notch. Don't worry about perfect alignment at this stage - just get all the pieces seated in their notches.
After all the rail pieces are in place on both sides, inspect them from above, and adjust them so that each piece points out from where it meets the joiner at about the same angle as the pieces around it. This used to be a 90 degree angle all around, but I've been getting fancy with this and altering the angle to point more forward or backward near the ends of the board. With laser-cut kits, the nice straight fit of the rail pieces into the joiner will generally align the pieces as intended, but you'll probably still find a few that need a nudge.
Then get your eyes down at the side of the board and sight down the rail toward the nose or tail. Work your way around the board from this perspective, adjusting any wayward pieces whose edges jut out of alignment with the smooth curves defined by the edges of neighboring pieces. Most often misalignments from this view are due to the joiner pieces not quite meeting end-to-end. Shim joiner pieces where they fit into notches, or try other ways to tease the ends into better alignment. Pretty good is good enough. The tension of the wet glass job will probably work in your favor to smooth things further. Glue is not usually necessary. I've glued the rail pieces in place on a few boards, to keep them from shifting as I spread the first layers of glass over the core. But I've found it's not strictly necessary. If the rail pieces seem looser than normal, I might glue some or all of them. But generally I avoid it. When I glue, I just use cheap, weak school glue, applied with a toothpick, or a spaghetti noodle. It's invisible when dry. (Cyanoacrylate glue would leave dark marks, it's much more expensive, and it leaves little hope of an easy fix if misapplied.) |