|
A Whole Page Dedicated to Gluing Pieces of Cardboard Together
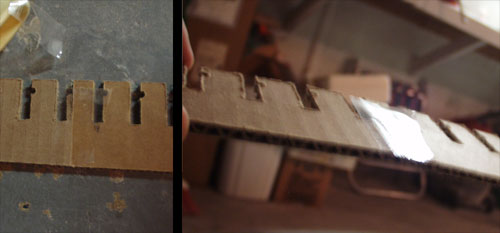
The stringers are cut in sections whose length is determined by the longest dimension of the cutting machine, which, for now is about 24 inches. Having to glue these sections together is a minor inconvenience, hopefully offset by the ease of shipping 2 foot sections, as opposed to 6 to 10 foot sections of cardboard. This page offers tips on the simple chore of gluing the stringer sections together. Method One, For the Patient
In one photo, that's how to do it: Use a block with a straight edge to align the bottoms of the two pieces, butt the two pieces together over a piece of wax paper, hold the pieces in place with one hand and move the block away, apply CA glue to the joint, wait a minute or so for the glue to set, then carefully flip and apply more glue to the joint on the other side. (Don't flip too soon - if you break the first glue line, it won't re-bond well just by adding more glue. In that case, you'll probably need to glue sturdy paper over the joint line. This makes a strong joint, but it's more of a hassle.) But I can't just leave it at that. There are lots of these joints to glue, and each time you're standing there holding the pieces together while the glue sets, you get impatient and start thinking up ways to improve the process and speed it up. Eventually, I'd like to make the pieces go together with a self-aligning puzzle piece joint that you could glue and move on. Until then, I'll be doing it like this: Method Two, For the Less Patient
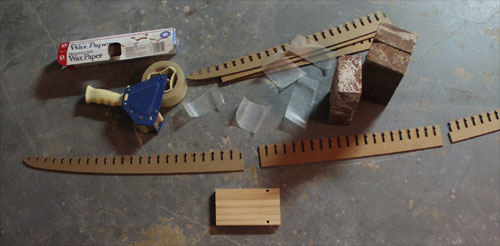
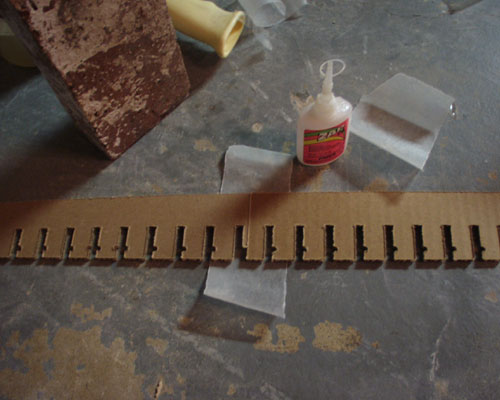
I came up with a way to use tape to hold the pieces in alignment while gluing, so I could move on to work on another joint while the previous one set. Here's all the stuff involved: CA glue (ZAP or ZAP-a-Gap has worked best for me, ZAP-a-Gap seems to be the best for this application), wax paper, small flat weights (bricks), clear packing tape, and a block of wood with a straight edge.
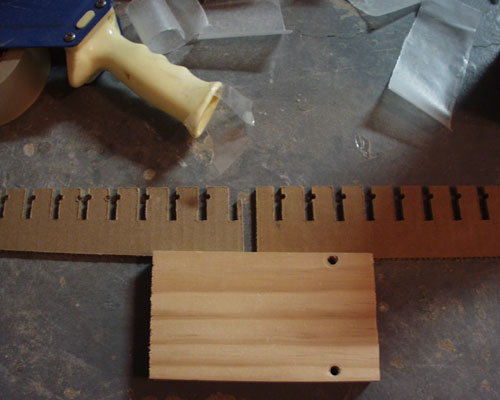
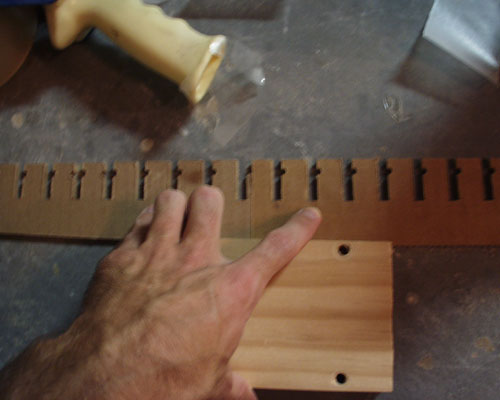
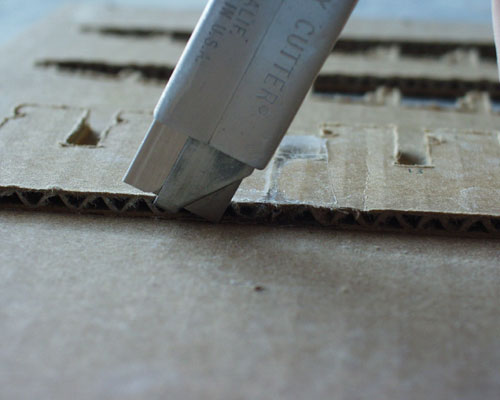
Use the straight edge of the block to align the bottom edges of the pieces at the joint. Hold one piece flat againt the block and slide the other piece along the block edge until it butts up flush against the first. With router-cut pieces, it's usually good to slide and crash them together a few times, until they come together solidly, and the joint looks and feels really straight and solid. With laser-cut pieces this won't be necessary, since it's easier to see and feel when the cleanly-cut edges are in full contact and well aligned.
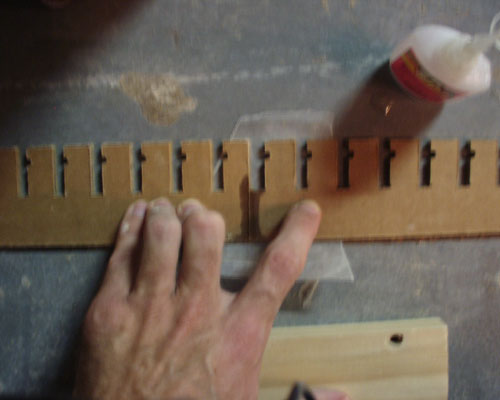
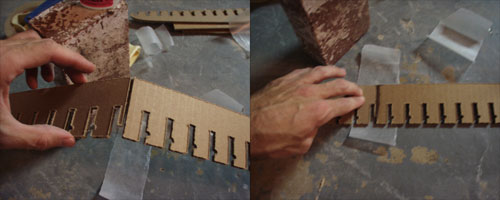
While holding the aligned joint firmly in place with one hand, grab a piece of tape with the other and tape the joint. Notice I've got tape pieces prepared, stuck to the end of the tape gun handle.
With tape well applied to one side of the joint, you can handle the joined pieces a bit without ruining the alignment.
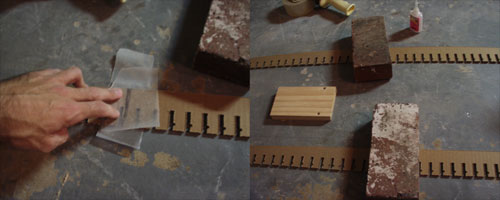
Flip the joined pieces over, so the taped side is down. Put some wax paper under the joint. Get a piece of wax paper ready to put over the top of the joint. Have a brick near by.
Raise the joint, bending it open. Apply a bead of glue to the open joint crack, making sure it gets down to the bottom of the crack, while still wetting the top edges of the crack. Then lay the joint back down flat, on top of the wax paper. (With laser-cut joints, you may not need as much glue. On the other hand, the cleaner cut edges might not give as much bonding surface, which could lead to a weaker joint. Try it and see. If you think it needs more bonding surface you might try placing strip of paper (grocery bag paper would be good) over the the wet glue line at the joint.)
Place the other scrap of wax paper over the glue joint, covering the whole area where the glue has spread. Place the brick on top of the joint. Now, you are free to move on to work on another joint, while this one sets. Come back in a few minutes, and this joint should be solid.
Trim the tape if it hangs over the bottom or the notch openings. You'll also want to trim or file off any rough edges formed by the glue on the top and bottom edge of the glue joint, so that later when you're pulling fiberglass smooth over the core, the fabric won't snag. Finally, realize that these joints contribute very little to the final strength of the board. They only need to be strong enough to hold up to handling while you are assembling the core. The main purpose of gluing these pieces together is to keep them in alignment up until the time of glassing. The final board structure gets most of it's lengthwise stiffness from the fiberglass+epoxy skins being separated, but connected, by the core - that's the magic of composite sandwich construction. The simplest glue joint here is likely as strong or stronger than the cardboard to either side of it. So don't go overboard reinforcing these joints. On one board I skipped the glue entirely, and just used regular scotch tape on each side of the stringer butt joints. The joints were flimsy, but they stayed in alignment. Once the whole self-aligning and reinforcing core structure was together, the weak stringer joints were irrelevant. |